I am beginning to worry because it seems that every few blog posts that I am writing here seem to be me telling a story of how I goofed something up and then (for the most part) recovered it. The most recent of these happened with my pastel caracal “Marthe” were I sprayed the soft chalk pastel and caused the colors to shift and darken. Fortunately, I was able to draw over that piece and add the lights back into it and save the painting. In the process, I not only learned what not to do, but I also learned that that after spraying the soft pastel that was applied to the Pastelmat paper, I was able to add several more layers without the paper becoming over-saturated. This could be useful in a future piece and I thought the information was useful. It was a good lesson.
We often learn from our errors. Whether we realize it or not, there truly is no better teacher than experience. Once we struggle through the initial disappointment of having something turn out not exactly as we planned and then figuring out an alternative solution, the process seems to register more intensely than if we were just told something by someone else. Nevertheless, I still like to share my own experiences here with you all in the hopes that you can learn from my mistakes and experiences. I want to stress to you all that mistakes don’t always have to end in disaster, and that if we put a bit of thought into finding a solution, there are many instances when the end result is not only adequate, but exceeds our expectations and teaches us something new. And that can be quite exciting.
Last week, in between doing my work on the bakery project and my taxes, I took some time to play with my beautiful Sennelier Oil Pastels. One of the things that I promised myself over the new year was that no matter how busy I was, I needed (yes – NEEDED) to take time in the evenings or ever for a day to just play with the amazing supplies that I have accumulated. I have stated here many times how much I love my job, and when things get busy I tend to spend long hours working late in the shop or packing or filling orders. I usually do this seven days a week – as long as the orders keep coming in – but I realize that if I don’t take time for myself to create my own art and pieces, and to learn, that I will run the risk of beginning to resent the business and burn out. It is all a matter of balance we need to maintain – especially when working from home.
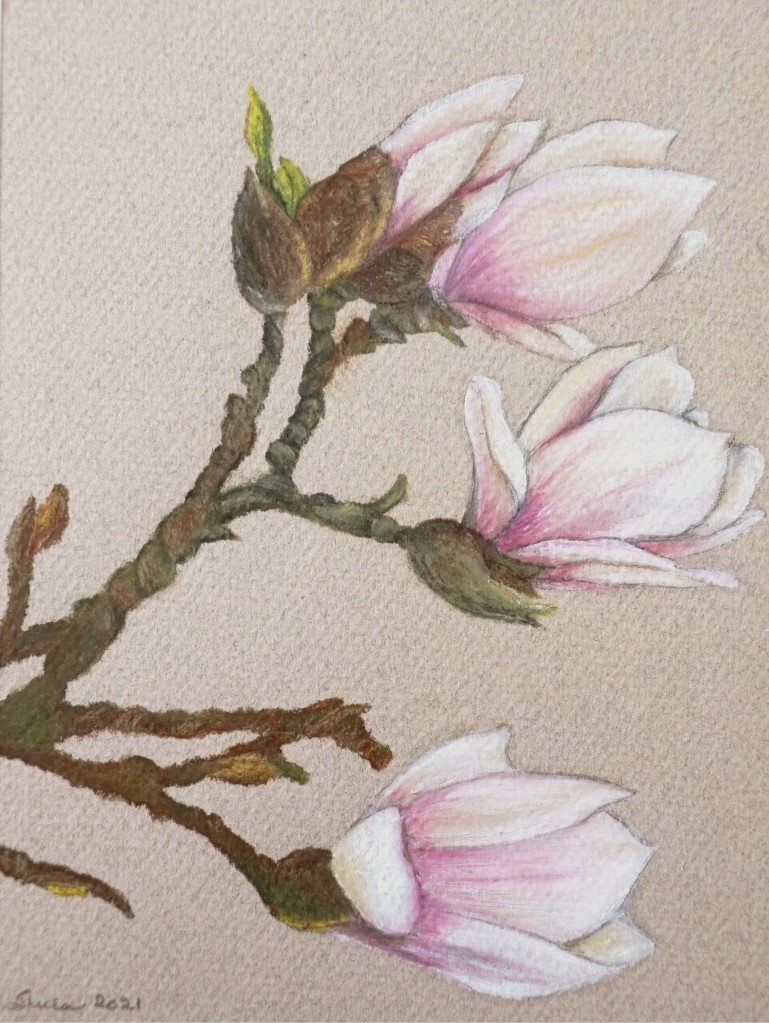
So I was in the mood for something that reminded me of spring and I found a beautiful photo on Pexels by Karolina Grabowska of some lovely Magnolias. I thought it would be the perfect reference for my drawing.
The media I chose to create this painting was not easy to decide. I have so many wonderful supplies and I often wonder which one to use for a particular piece. But over the past several months, I had purchased several lovely tinted pastel papers by Canson that I really wanted to play with. The particulars on the paper for those who are interested is that it is the Canson Mi-Teintes Pastel paper, which is 90 lb or 160 g. It is a cotton paper and is textured on one side and smoother on the other, so it is great for a variety of applications. Because this paper is tinted, I wanted to use something that would be opaque and work well with the colored surface. So I chose my Sennelier Oil Pastel crayons that I had received for my birthday. I just love using them and I thought they would blend and work well. I have only managed to do a few pieces with them, but with each one I am becoming more comfortable and I am happy with the result. Since I am allergic to oil paint, this is a wonderful alternative. They blend for ever and have no odor at all that I can detect. Not to mention the wonderful control in applying them.
So I began working and creating my blossoms. The first one I did was the bottom one. It was “ok” but not great. But as I moved on to the other three, I began to feel more comfortable with what I was doing and I really liked the way things were developing.

I thought I would be able to go back to the bottom one and correct what I didn’t like on it, which ultimately, I was able to do. One of the things I like most about the oil pastels is that they stay workable for days and even weeks. So you can even scrape off what you don’t like with a knife (GENTLY!) and re-do something you aren’t happy with. Of course – the paper underneath is stained, but as long as you stay in the same place – such as in the surface area of the flower – you can reapply the pastel over the cleaned area for at least several more layers.
After playing around with it and re-doing the bottom blossom, I felt I was done.
I submitted the drawing to one of the groups I am a member of. It is by Lindsay Weirich and is a wonderful “Critique Club”. I have followed Lindsay for a couple of years now and she is a mixed-media artist and works with a variety of supplies. She is the one that actually sold me on the Sennelier Oil Pastels, as I saw a beautiful drawing she did of a parrot and I fell in love. She has loads of videos on YouTube and adds to them weekly and she has lovely classes and the very reasonable Critique Club that offers a wealth of information for a mere $5 a month. I love supporting artists such as this, as they give so much back to the community. You can see the critique club here: https://lindsayweirich.teachable.com/p/critique-club
Lindsay suggested that I leave it be for couple of days and then reassess it. She also thought adding green lichens to break up the color would be an improvement. I did try to scrape them back and try again, but it didn’t seem like the piece was receptive to much more pastel. I was going to leave it ‘as is’ and just chalk it up to experience and learning.
Then, as I was watching some art videos in the middle of the night when I couldn’t sleep, I saw an artist applying gold leafing accents on some of her watercolor artwork. Then it hit me . . .
“I” have lots of gold leafing! 😀
I am always looking for something to use it on and never much think of it. I just wondered if it wouldn’t work in this instance to break up the solid color of the stems and add some interest.
I also had another idea . . .
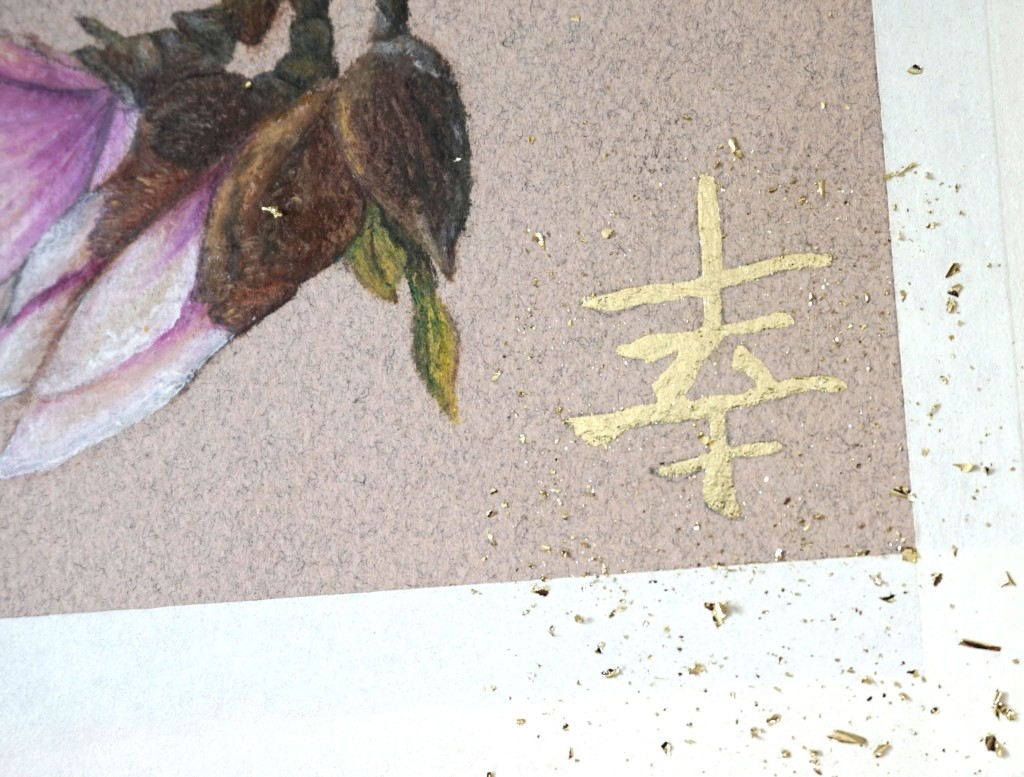
The piece had a definite ‘Asian’ feel to it. So I had the thought of adding an Asian symbol to the painting would also make it look nice. Keith had made a lantern pattern the first year we were working together and I fished out that pattern and yoinked that symbol (which is supposed to mean “Happiness”) and sketched it onto the upper left corner. It was as if it was made to be there!
I pulled out my Metal Leaf Adhesive sizing and applied it over the symbol sketch and as I would highlight the stems if I were painting with a lighter color. I also touched just a bit of it to the brightest parts of the petals. It took about an hour or so to dry, but when I came back, I was ready to see if it would work.
Fortunately, I picked the small leaf on the bottom left of the painting to try first. As I applied the metal leaf, I noticed and realized that the oil pastel by nature is quite ‘tacky’ – even though it was dry. For anyone who has used metal leaf, you realize that it sticks to just about EVERYTHING. That wouldn’t do! The entire leaf was just about covered in gold.

I would have had an entire gold silhouette had I continued in that matter. (Sigh!)
But I wasn’t beaten yet. I went over the symbol, and the leafing looked really good after brushing off the excess:
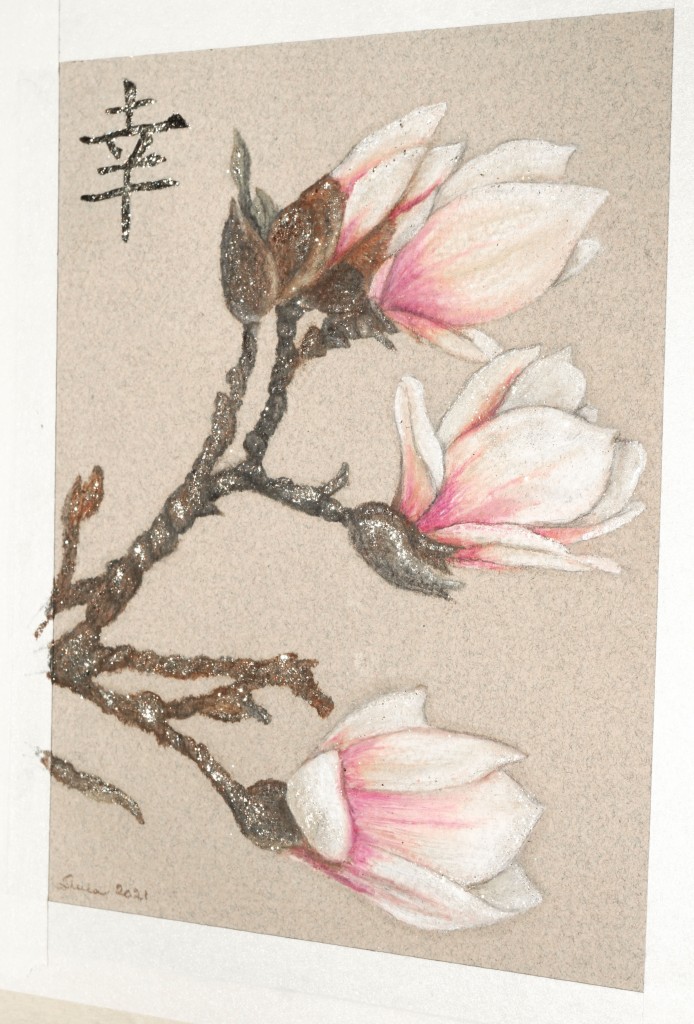
When brushing off the excess, I noticed the pretty, tiny crumbs of leafing that were the result of the ‘waste’. A few flecks had stuck to the stem areas where I had applied the adhesive. I had an idea . . .
I used a small stencil brush to ‘pick up’ the crumbs of leafing and gently tapped them into place a few at a time. This was very similar to ‘stippling’ in painting with acrylics, only I was, in essence, transferring only a few crumbs at a time. The adhesive grabbed the tiny pieces and held them into place nicely, and I was able to brighten up all the places that I intended to without much issue. If too much stuck or if there was too large a flake of gold leaf applied, I was able to take my knife and gently scrape it away. This seemed to be the perfect answer.
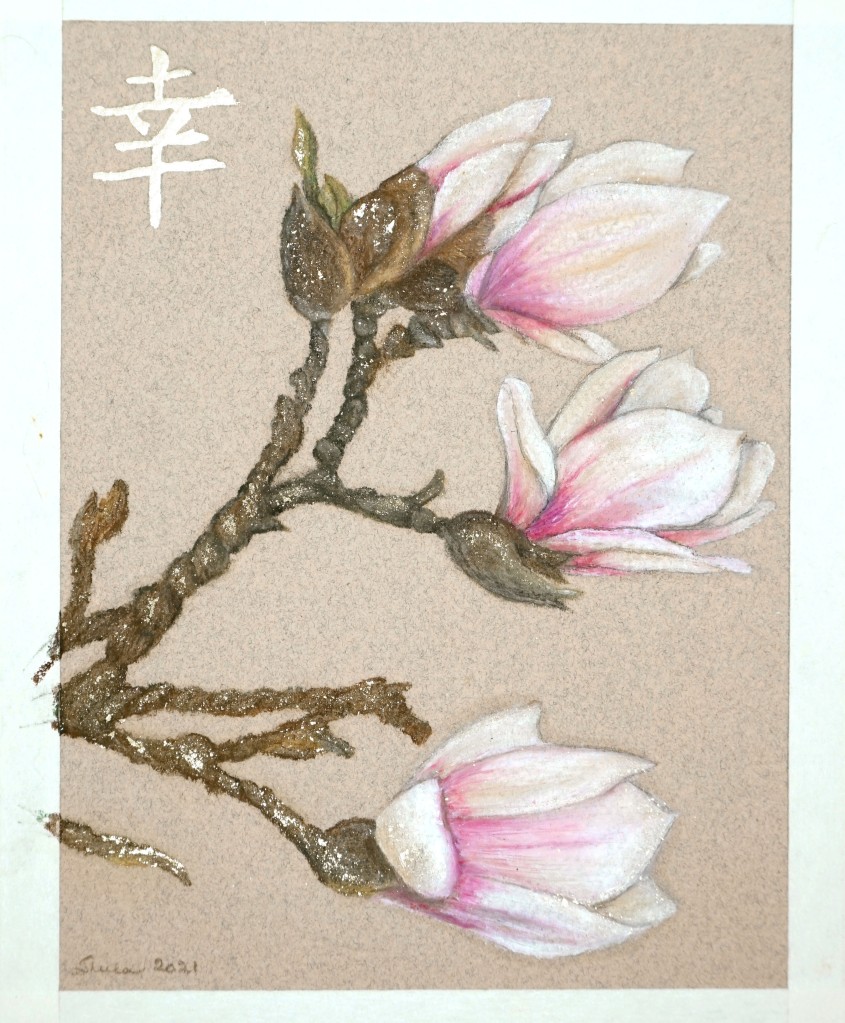
I am now really pleased with the result:
I have a link to a short video to show you better how nice and subtle this effect is if you are interested:
I think it looks much better than it did initially. It made a nice difference.
When I began this painting, I would have never envisioned it as it wound up turning out. The main goal I had was to relax, familiarize myself more with the oil pastels, and have some fun! Little did I know how much I would learn in the process!
I guess the moral of the story is ‘Nothing is really a lost cause’. Even if our artwork winds up in a folder where I know I will never be displaying it, I keep the ‘mistake’ pieces just to remind myself that everything doesn’t always happen right the first time. Moreso than not, it takes several attempts and sometimes some time away and thinking to come up with a way to make things work. It is part of the learning process and why I like to share these stories with you all.
I hope you enjoy reading about them.
Until next time . ..


Wow! Super happy you didn’t stop! Now to pull out my bloopers and work out solutions…thanks for the inspiration!
LikeLiked by 1 person
Sometimes letting them sit for a time helps. We come back with different ideas later on and can try it. We can’t look at it as ‘failure.’ It is all a process and I find the most important thing is if we learn from where we fell off of our path and our original idea went astray. Many times, the new direction is even more exciting. I went from ‘liking’ this design to kind of ‘loving’ it. It isn’t too gaudy and now looks more elegant. I am so glad I didn’t abandon it. ❤
Thanks for your comment. I hope you share your 'bloopers' too. ❤
LikeLiked by 2 people
That looks great! We learn best through mistakes.
LikeLiked by 1 person
I do believe that is the best teacher. The subtle decisions that can go one way or another are difficult to learn from watching others – although seeing them does give us an idea of which direction things may go. I think the most important thing is to not look at each project as a ‘masterpiece in the making’. There are times when we have to just create for creating sake and let the chips fall where they may. Thanks for weighing in.
LikeLiked by 2 people
Beautiful work Sheila. I, so glad that you shared your mistakes and the remedies you used to fix them. This gives me hope to know that not everything I goof up on will eventually end up in the garbage bin. Thank you for sharing.
LikeLiked by 1 person
Fabulous save Sheila! It looks fantastic. I always find creative people are very good problem solvers!👍
LikeLiked by 2 people
These boo-boos lead to new techniques, don’t they? We don’t have to love everything, but sometimes, stumbling helps us find a new (and many times BETTER) path! ❤ Thanks for stopping by!
LikeLiked by 2 people