“To plant a garden is to believe in tomorrow.”
-Audrey Hepburn
Ahhh, Spring!
While it is probably not my favorite season of the year due to the often unkept promises of warm, breezy days of birds singing and buds blooming, even I can’t deny that when those types of days actually do play out, it makes my heart happy. It seems to promise better days to come.
Today is just one of those days here in my little corner of the world.
We awoke with a brisk three degrees (Celcius) this morning and a blanket of fog, but as the sun rose and the clouds cleared, the temperature has risen quite a bit and the sun is bright and warm. It is turning out to be a banner day.
I can see a walk in the afternoon – perhaps along the shoreline – and I think we will take out the grill and barbeque our supper tonight. It is calling for rain over the weekend and I want to enjoy the day as much as possible. Even if it is just for a few hours.
This past week was rather dull and dreary weather-wise. We had cloud cover all week and while we did go out for several walks (we try to do so nearly every day), we still needed to bundle up a bit and the landscape isn’t quite green and thriving yet. But that is also starting to change. Our trees are finally showing signs of life with buds and small leaves sprouting and beginning to fill them in. Soon everything will be reawakened and look alive again. I can’t wait.
Even though the atmosphere may not be quite as ‘springlike’ as I would want it to be, it doesn’t mean that I am not working on some projects that give the feel of spring.
I actually finished three things this week, in addition to my ‘regular’ work of cutting wood for orders to be shipped. (And here it is only Friday!) I feel pretty accomplished at the moment and look forward to a good and productive weekend. I have some new designs that I am working on in order to make them into patterns, and I will give you a sneak peek at one of them at the end of the post. But first I want to show you a long-term project and one in which I learned a great deal while making. After all, we seem to learn best while doing. At least I do.
The first project is not a painting project, but an embroidery project that I have been working on for just over a year in my spare time. As many of you may know, I love to embroider and there is something calming and fun about pushing that needle and thread through the fabric to make something pretty. I have such an amazing collection of thread, beads, and lovely fabrics that part of me could easily spend a lifetime doing hand embroidery. But then I would miss painting! So it is a little of this and a little of that as time will allow. I don’t think I will ever be bored.
So a year or so ago, I received my newsletter from the Australian embroidery magazine called “Inspirations”. As the name implies, it always has so many beautiful projects that do, indeed inspire. I have been thrilled that they actually have begun to offer projects and patterns in a digital format, as shipping from Australia can be very costly.
I saw the project for a pair of beautiful ‘trinket posts’ embellished with exquisite stumpwork flowers. When I saw the hydrangea pot, I knew I had to make it. (You can see the pattern here: https://www.inspirationsstudios.com/product/flower-pots-apfn2-digital/
I immediately ordered the pattern and began planning. While I didn’t use the exact threads that were called for in the pattern, I thought it would be a wonderful opportunity to use my own stock of supplies. The hydrangea box required nearly 100 stumpwork petals to be made, as well as three larger stumpwork leaves. I thought it would be a wonderful project that I could mindlessly work on at the end of a busy day while watching a show in the background. I wouldn’t have to think too much and because of the portability of embroidery, I could pull things out in the blink of an eye and work on it as long as I felt like it and easily tuck it away. It was a perfect project for evenings.
To make a long story short, I worked on it somewhat irregularly over the past year. Each petal took about two hours to complete, and there are 96 of them. (Plus three larger leaves). It was definitely something that was one of those “enjoy the journey” projects, and YES! I absolutely did! (All the while, Keith was in the background telling me how crazy I was! LOL!)
Without further delay, I will get to the photos . . .
I didn’t start taking pictures until I was done with the petals. As I began attaching them to the wool felt base of the box, it dawned on me to do so.
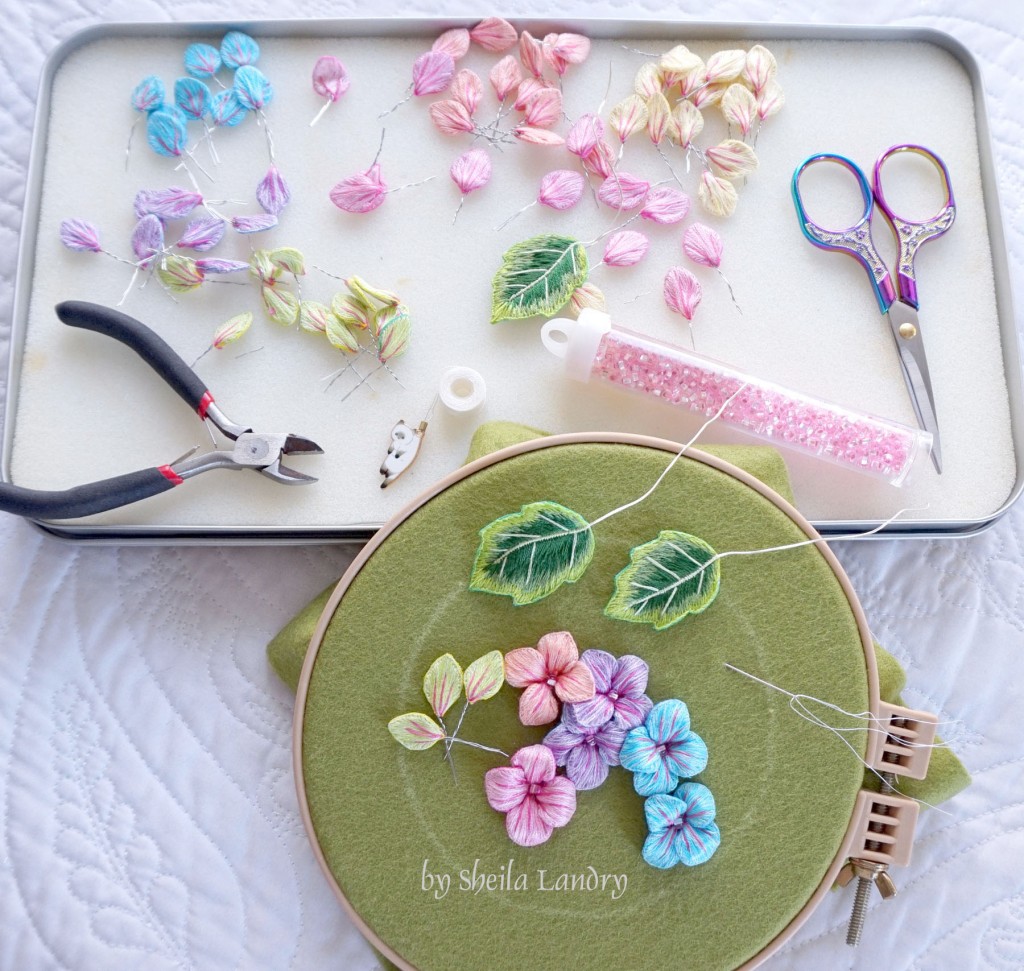
I used two similar, yet different colors of DMC floss when embroidering the petals, which gave them a pretty, variegated, and more natural look. Also, each of the petals had pink vein lines embroidered on them, which made all the lovely colors look cohesive.

They were each embroidered around a wire so they are able to be shaped and all of the flowers had a glass, pink bead in the center.
As I began assembling the flowers, I got more and more excited about the outcome.
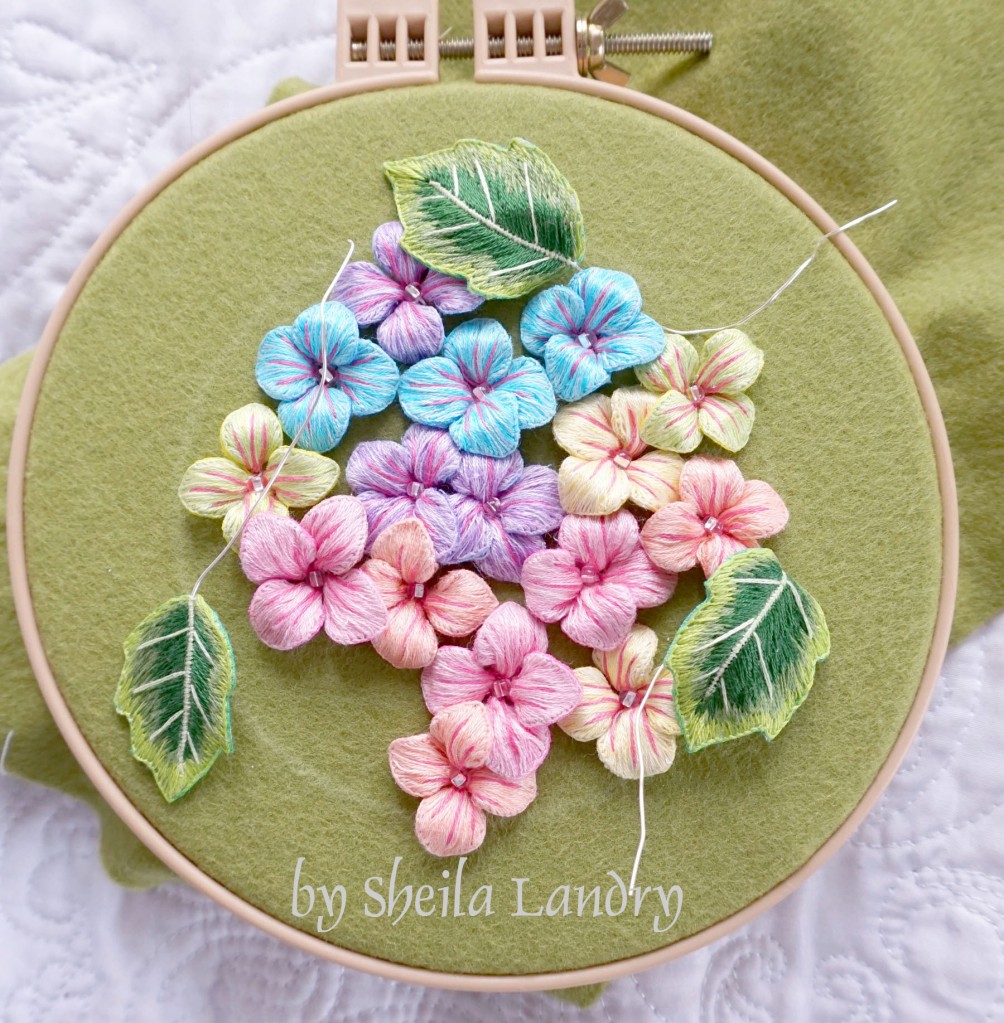
What a beautiful riot of color!
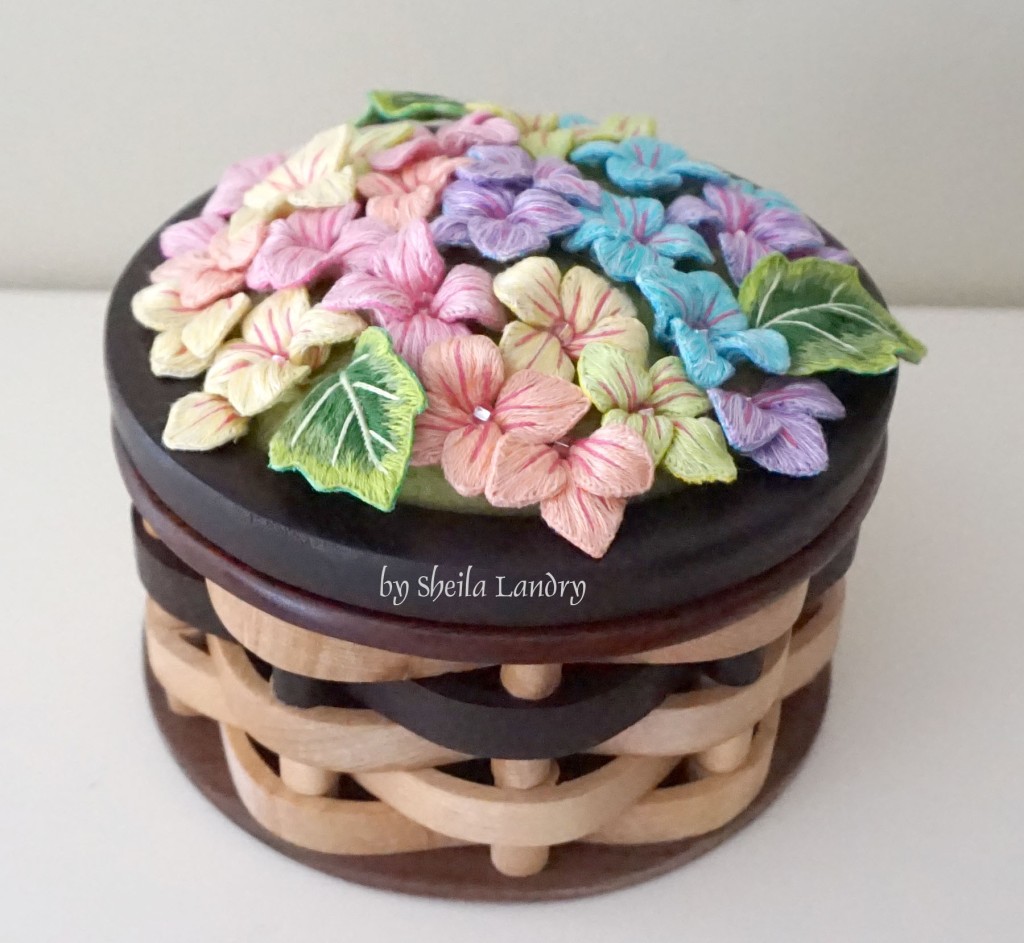
I decided that by the time I was done creating the petals and leaves, I just wanted to be done with things. The box from the pattern had embroidered sides, that resembled a barrel, but since I am a woodworker, I thought that I would create my own version of the box on the scroll saw. That way it would be a bit more sturdy and be able to hold more than the one in the example.
I used maple and walnut hardwoods and cut the layers of the box:

And then I glued everything together and sprayed it with lacquer to finish it. It came out just awesome!
Figuring out how the lid would go together was a bit of a challenge, but with a few suggestions from my partner Keith, I came to a workable solution.
The padded lid is bursting with pretty colors of flowers:

The walnut frame around it sets things off so nicely! It is about six inches in diameter:
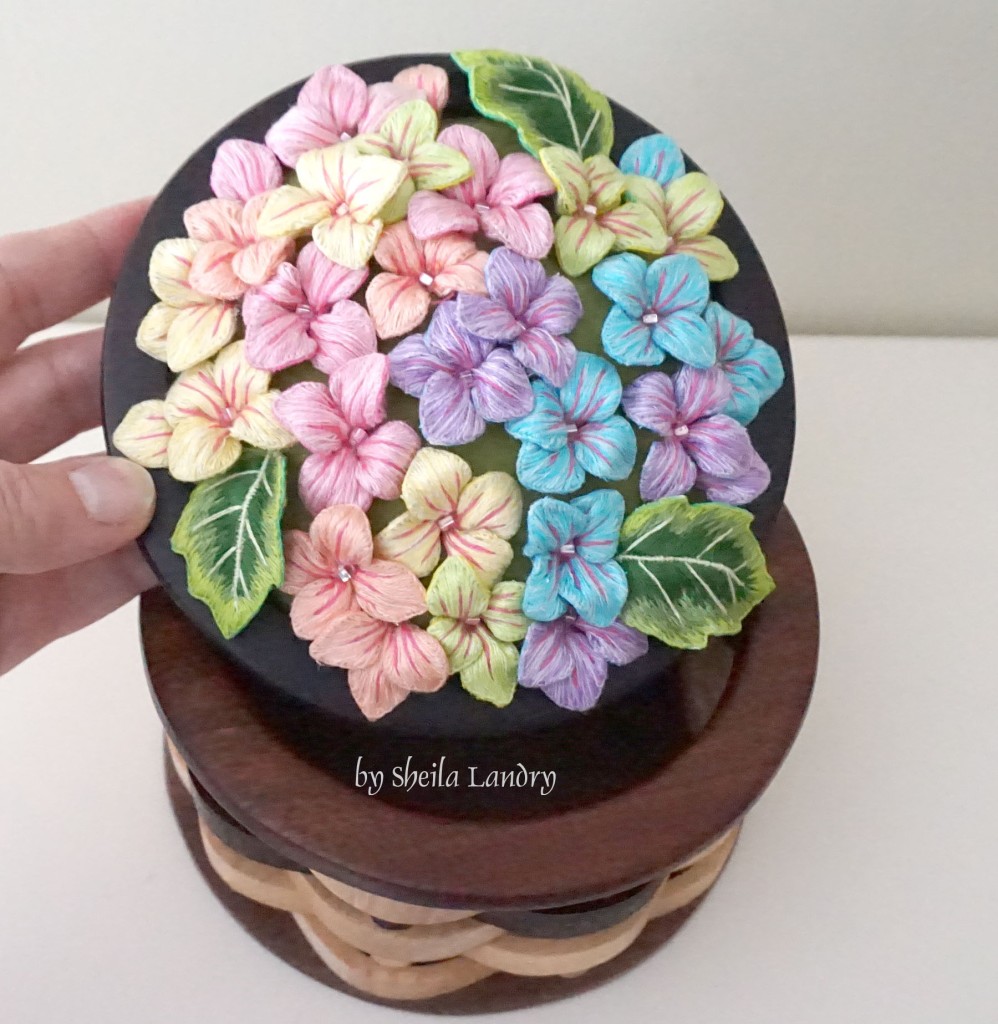
And the inside looks lovely and neat:

I am beyond thrilled with it and as it sits here in my studio, it brings a lovely feel of ‘spring’ inside – even on those dull, dreary days. I usually wind up giving much of my embroidery work away, but this one I want to keep for myself. I really loved making it!
My friend Vera gifted me a beautiful nautical-themed embroidery book that I had been eyeing not too long ago, and that really lit a fire under me to finish this one up. I have some ideas on using some of the designs in that book for my next needlework undertaking, but I will show you that later on as it develops. Until then, I will enjoy this one. I hope you all like it as well.
Another thing that I accomplished this week was to play a bit with my Derwent Inktense blocks and do a small botanical painting.
A couple of weeks ago, I had an idea for making somewhat of a palette to hold my Inktense blocks while I use them.
Inktense blocks are beautiful and unique, in that they are sticks of pure color that can be applied wet or dry for (pretty much) permanent results, meaning they won’t lift off like watercolor and you can layer color without worrying as much about making ‘mud’.
However, it can be very difficult to distinguish the colors, as they tend to look very similar.

As you look at them in the photo above, you can see how difficult it is to tell the colors – especially on the dark blocks. This is one product that I find imperative to swatch out when using them.
However, you can see from the two blocks on top of the swatch sheet, that once set on a surface, it was once again nearly impossible to tell the color. I tended to set the blocks that I was using on my desk and then I would mix them up. The color numbers are embossed in the material, but once they got used and that was dissolved, it would be very hard to tell what is what.

My answer to that was to wrap a piece of artist’s masking tape on the end of each block and apply the color number with a permanent marker. That way I would be able to easily distinguish which block was which.
To further keep me organized while painting with them, I purchased a small, wooden pencil box on Amazon and painted it with DecoArt’s cream-colored Satin Enamel paint. That way it would stay clean. I had found some extra foam insets from some Conte crayons that I had (or you could use your own foam and an Exacto knife to cut spaces for the blocks.) and I set up my ‘palette’ with the colors that I used for the project.
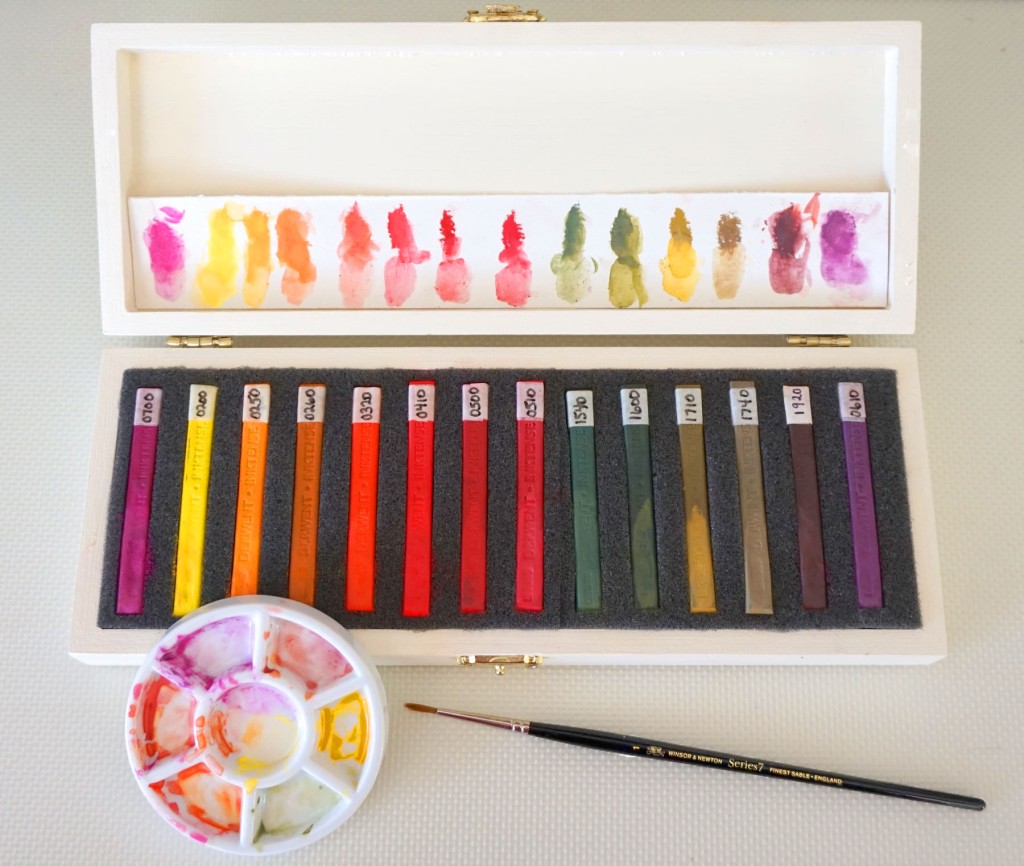
Since my preferred way to use the blocks was to scribble them on paper and pick up the color with a wet brush, I cut a piece of scrap watercolor paper and scribbled a swatch for each corresponding color as shown. I used a damp brush and pulled just a bit of the color so I would see the actual tones and have my palette ready to use. It worked beautifully!
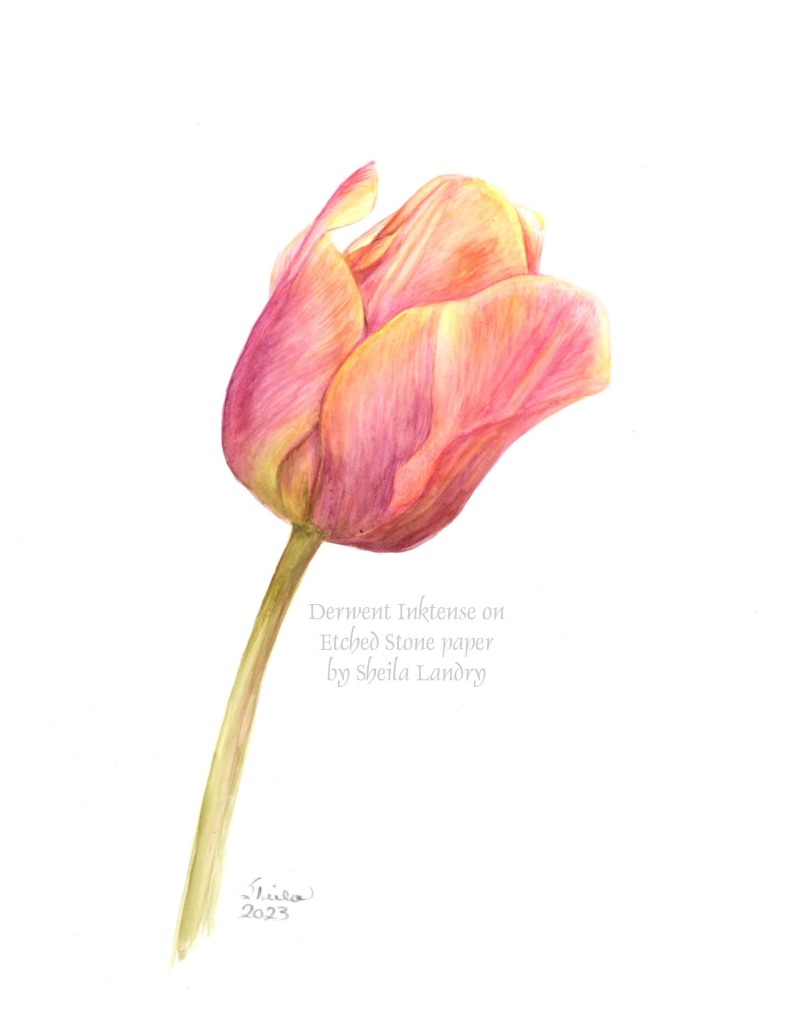
I wanted to use some pretty, bright colors, so I picked a photo of a tulip from Pixabay. I used my small ceramic palette (as plastic palettes tend to stain) and used it to mix and tone each color as I would do with traditional watercolors. For painting, I used my beautiful Winsor & Newton Series 7 handmade sable brush, as it is a very soft, yet absorbent brush that came to a needle-sharp point. It worked beautifully for this project.
I decided to use the Etched Stone Paper that I spoke of in my previous blog, which I talked about here: https://sheilalandrydesigns.wordpress.com/2023/02/05/etched-in-stone/. I am an ambassador for Etched Stone Paper and I will have some exciting news to tell you shortly. I love their paper so much and will be using it more often in my projects. If you wish to try it with a 10% discount, you can go to my affiliate link here: https://etchedstonepaper.com/collections?ref=sheila and use the promo code SHEILA10 for a discount. I do get a small commission for you doing so.
I absolutely love using Inktense with this paper. While there was a little bit of a learning curve for me, as I figure things out, it just gets easier and easier and it is a lot of fun.
I was able to mix the colors and create pretty much the same tones as my reference photo:

My system that I developed worked perfectly! (YAY ME!)
While I have full sets of both the Inktense pencils and blocks, I really feel that the blocks give you much more material and are a bit more versatile. I tend to use them more.
I understand that Derwent has created 28 new Inktense colors (in PENCIL form only!) and I already put a pre-order for them in the UK to have them sent to me. They aren’t quite here in North America yet but are coming soon. I just couldn’t wait!
In the end, the tulip came out pretty nice. It took me about three hours to complete. The sample photo is on the bottom and my painting is on the top.

All in all, it was a fun experience. While this paper may not do well for all wet mediums and/or take adjustments, for smaller, detailed drawings such as this, it really did a beautiful job. I plan on doing some videos very soon on the techniques I use and also offer up some pointers when using these two products together. I want to be just a bit more sure myself of what I am doing before I film though.
I am really thrilled with the pretty flower and can’t wait to paint something else.
So that is about it for this week. I promised to show you a peek at something upcoming, and here you go:

This is a Red-Bellied Woodpecker that I just did a quick watercolor painting of in my sketchbook. He isn’t even on watercolor paper – just 80lb sketchbook paper. But he came out nice and I will be re-doing him in acrylic format (DecoArt) for the next bird in my songbird series. I will work on him more this weekend.
I may also re-paint the tulip in another medium as well. I love doing the same subject in different mediums, as each one gives a different and unique look. I could even try to do the tulip as an embroidery project, I suppose. Wouldn’t that be pretty? 😉
I hope you like this look into my week. I spent some time talking to an admired colleague and friend from my Chicago days too and we were bouncing some ideas off of each other. It is great to have friends who understand us like that. My friend Vera has been really wonderful for me to share ideas with, too. It is awesome to be encouraged and share our creativity. It inspires us all.
I hope you all have a great week ahead. Rain or shine, I know I will be busy and happy. Thanks for stopping by and taking the time to read. You are always welcome to comment and share your thoughts with me.
Until next time . . .


Beautiful works!
LikeLiked by 1 person
Thank you very much! 😀
LikeLike
Each project is so encouraging and inspiring to others….and beautiful!
LikeLiked by 1 person
Thanks so much, Amy! We creatives need to stick together! Have a great week!
LikeLike
There is no emoji to adequately express my admiration for your ingenuity and skill. Truly, Sheila, these are all so beautiful – I can’t wait to see what you do next! ❤️❤️❤️
LikeLiked by 1 person
What a kind and uplifting comment! ❤ I so appreciate it. We all just do what we do to make our days happy. My favorite thing is creating and studying art. That is one reason I love your blog so much. It is always such a wonderful inspiration. Thank you for taking the time to comment. Have a great weekend!
LikeLiked by 1 person
😎❤️🌺
LikeLike
I’ve never tried embroidery, but sometimes I think I might.
LikeLiked by 1 person
You would absolutely love it. It is so relaxing and satisfying. I can refer you to my favorite online resources if you like. This box is done in a technique called “stumpwork” which was popular in the sixteenth century. it is dimensional embroidery. There are pieces (like the flower petals) that are made separately and added on for dimension. There are so many different techniques and most find a mixture of several in any given piece. That is why I like it so much. There are no hard and fast rules and you can allow your creativity to go wherever you want it to and have a lovely result!
LikeLiked by 1 person
The embroidery and the box are stunning Sheila. What a super idea for a box lid. Very unique! The tulip is beautiful and you have captured the photograph perfectly in the painting.
Happy Spring Sheila. After a few warm days here the garden is starting to pop with colour. 🌼🌸🌷
LikeLiked by 1 person
Good morning, Anna. 🙂 I did see your garden on Instagram. (I don’t go there often, but I saw it in my feed) and your yard looks beautiful. Thank you as always for your very kind words. I appreciate them very much. As you know – I love embroidery as much as painting and drawing. It is a really nice way to spend the evenings being creative without stress. 🙂
Have a lovely weekend.
LikeLike
Everything is so beautiful! I keep putting my cross-stitch aside and I need to get to it! I DO knit on a fairly regular basis though.
Your “down time” is always filled with such beautiful creations! I love them all!
LikeLiked by 1 person
Thank you, Barbara. It is fun to try new mediums. 🙂
LikeLike
Your talents seem to be endless. Truly beautiful work!
LikeLiked by 1 person
Thank you so much, Robin! 🙂
LikeLike
Beautiful pieces, I especially love the tulip – perfect petals, very pretty 🌷
LikeLiked by 1 person
Thank you so much, Cherryl! ❤ It was really fun to do.
LikeLiked by 1 person